Use a combination of quality, contrast, direction and colour to fight an object in order to reveal its form. For this exercise we recommend that you choose a natural or organic object such as an egg, stone, vegetable or plant, or the human face or body, rather than man made object. Man made or cultural artefacts can be fascinating to light but they also contain another layer of meaning requiring interpretation by the photographer; this exercise is just about controlling the light to reveal form.
Add the sequence to your learning log. Draw a simple lighting diagram for each of your shots showing the position of the camera, the subject and the direction of the key light and fill. In your notes try to describe any similarities between the qualities of controlled lighting and the daylight and ambient artificial light shots from Exercises 4.2 and 4.3
I took my time preparing for this exercise, waiting until I could experiment without feeling rushed. This Chapter in EYV has really opened my eyes to the possibilities that Light has and can bring to your images. It’s because of this I have recently purchased a soft box kit via Amazon and have been watching YouTube tutorials on Studio lighting to try and get a greater depth of understanding as I think I would really enjoy taking photographs in controlled conditions. Having now done this exercise I can appreciate the discipline and level of organisation that is required to ensure you keep track of everything and so you don’t get your images in a muddle when you come to use them or replicate.
By taking the advice of the brief to make a simple lighting diagram for each of my shots, it forced me to take tech notes and organise my data. I can see it is far too easy to forget details and confuse yourself when it comes to post production. Had I not been asked to do this I wouldn’t of realised how beneficial it is and will continue to do so each time I shoot this way.
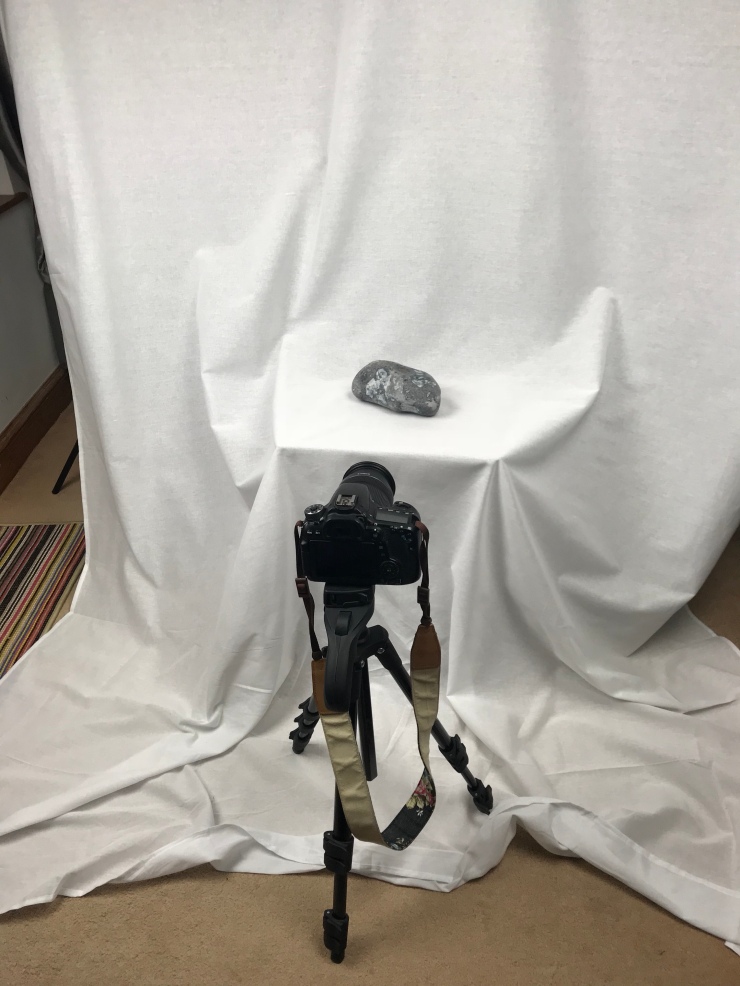
I chose to photograph a large beach rock which I placed on a white curved background. I used a white sheet with a table underneath to hold the rock in place. I used my tripod to hold my camera in place and to accommodate the slow shutter speeds that the brief recommended.
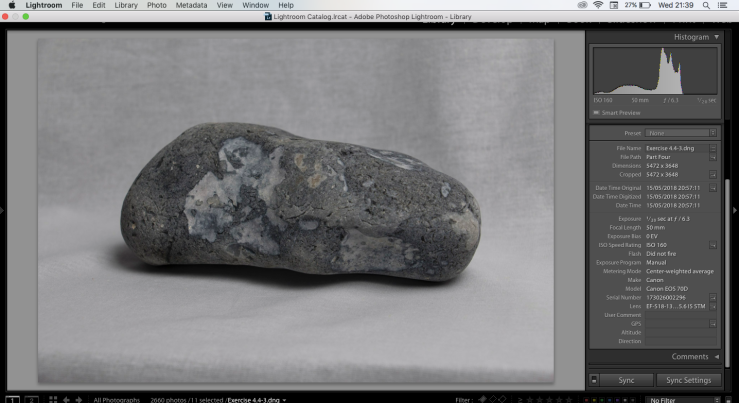
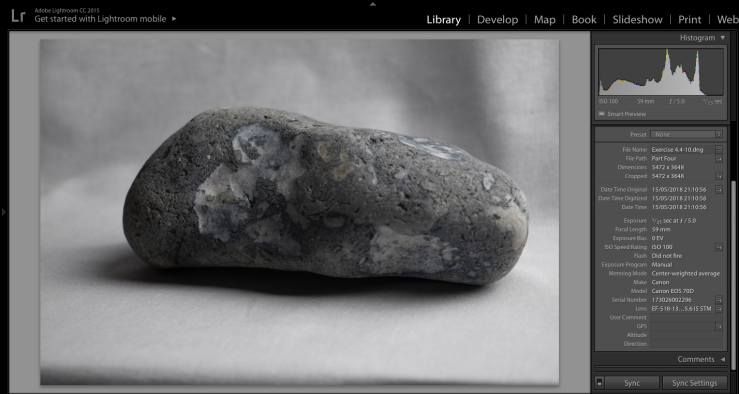
I have screenshot the images from Lightroom which have not been edited.
I have included the images this way as I didn’t want to make a mistake by marrying the wrong image to the wrong lighting diagram. As I wrote the shooting data down this way I can ensure I have the correct image. I also liked seeing them this way with the metadata and histogram visible.
I have also posted them individually again at the bottom as I quite like the results, especially numbers 5 and 7.

My make-shift studio in my lounge !
My subject – A rock !
1)
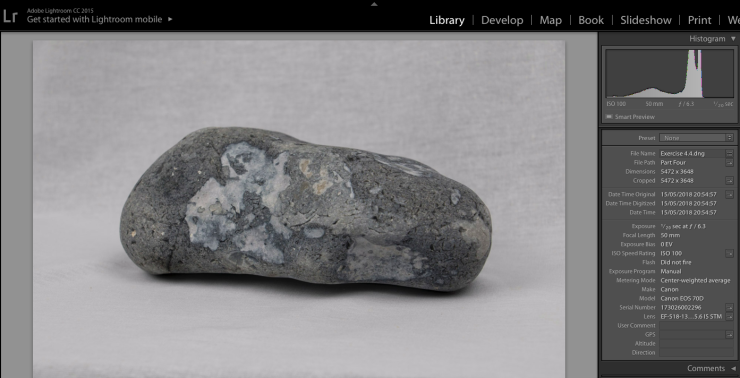
1/20 / F6.3 / ISO 100
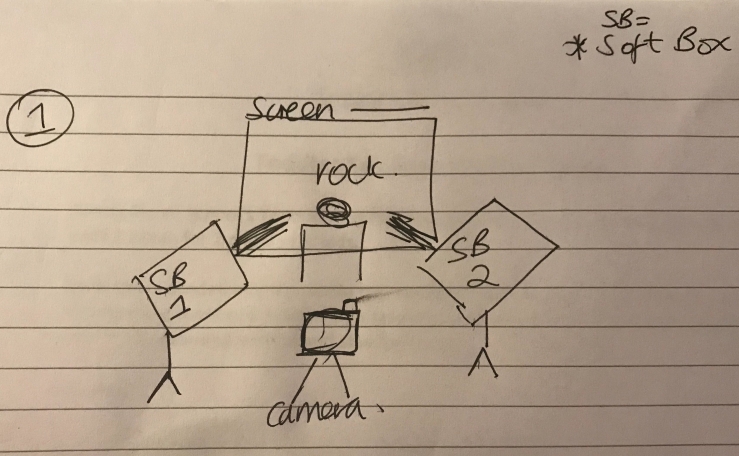
With the light hitting the rock straight on from both angles, the light acts as a filter making the image look crisp and clear against the all white backdrop. The only shadow being formed from the overhang of the rock as the light falls on it. Everything is illuminated.
2)
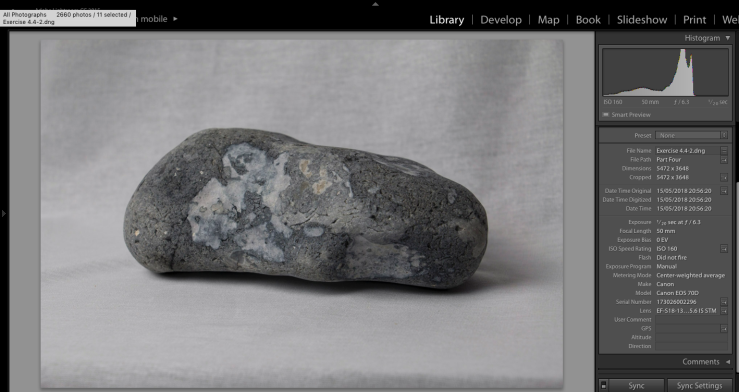
1/60 / F6.3 / ISO 100
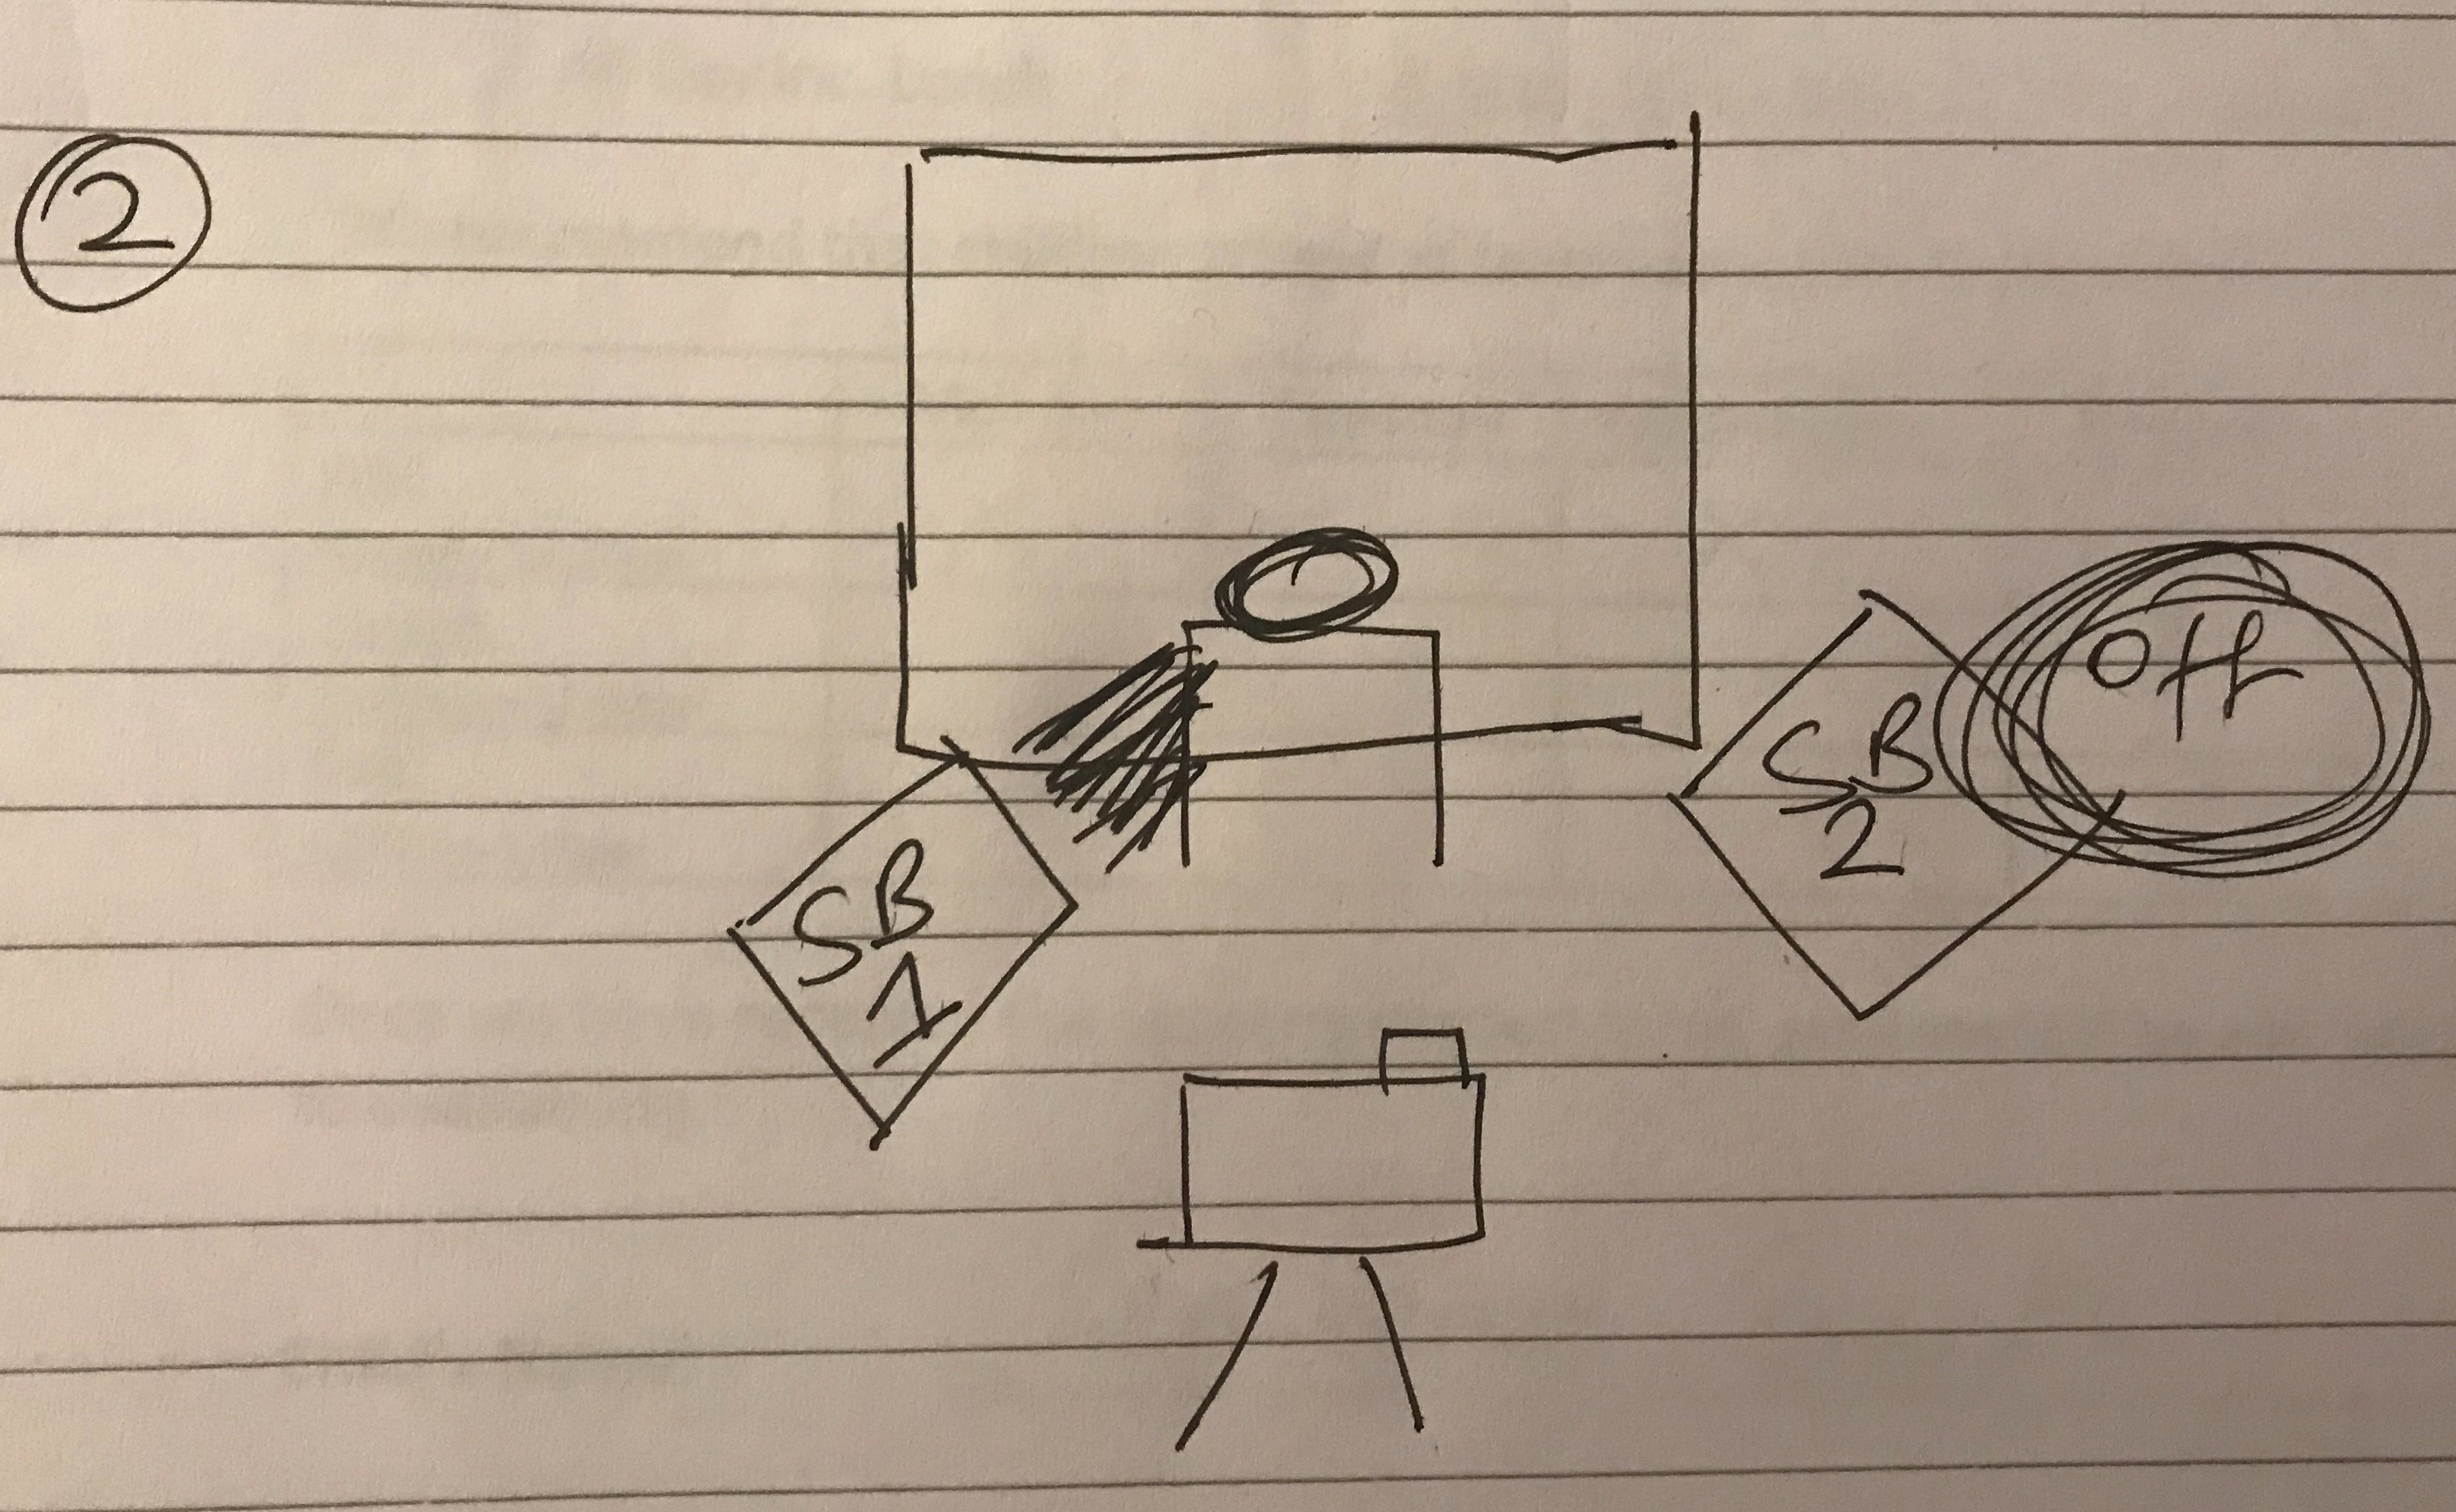
With the second soft box switched off, the only light source is from the first soft box positioned to the front left. This makes the image feel a little softer, not having such intense light shone on it and a very slight shadow to the right of the rock.
3)
1/20 / F6.3 / ISO 160
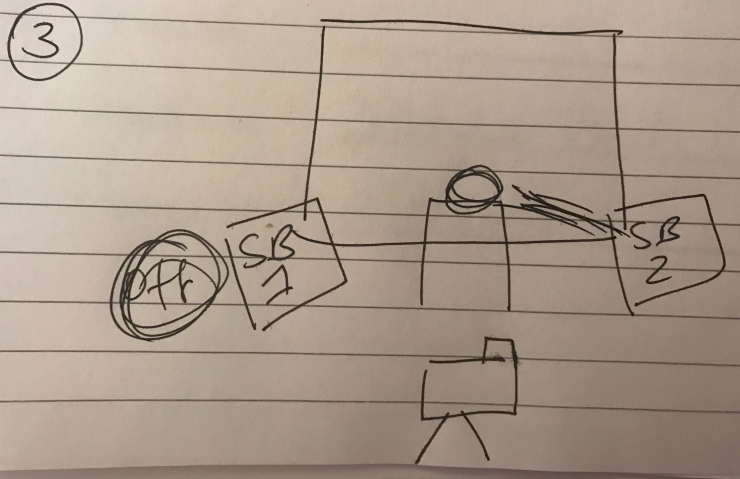
With the first soft box switched off and the second moved a little closer to the right side of the rock, it looks a little more dramatic, with greater shading formed underneath the rock.
4)

Auto Mode – 1/160 / F5 / ISO 250
Wanted to see the settings my camera defaulted to as it read the light.
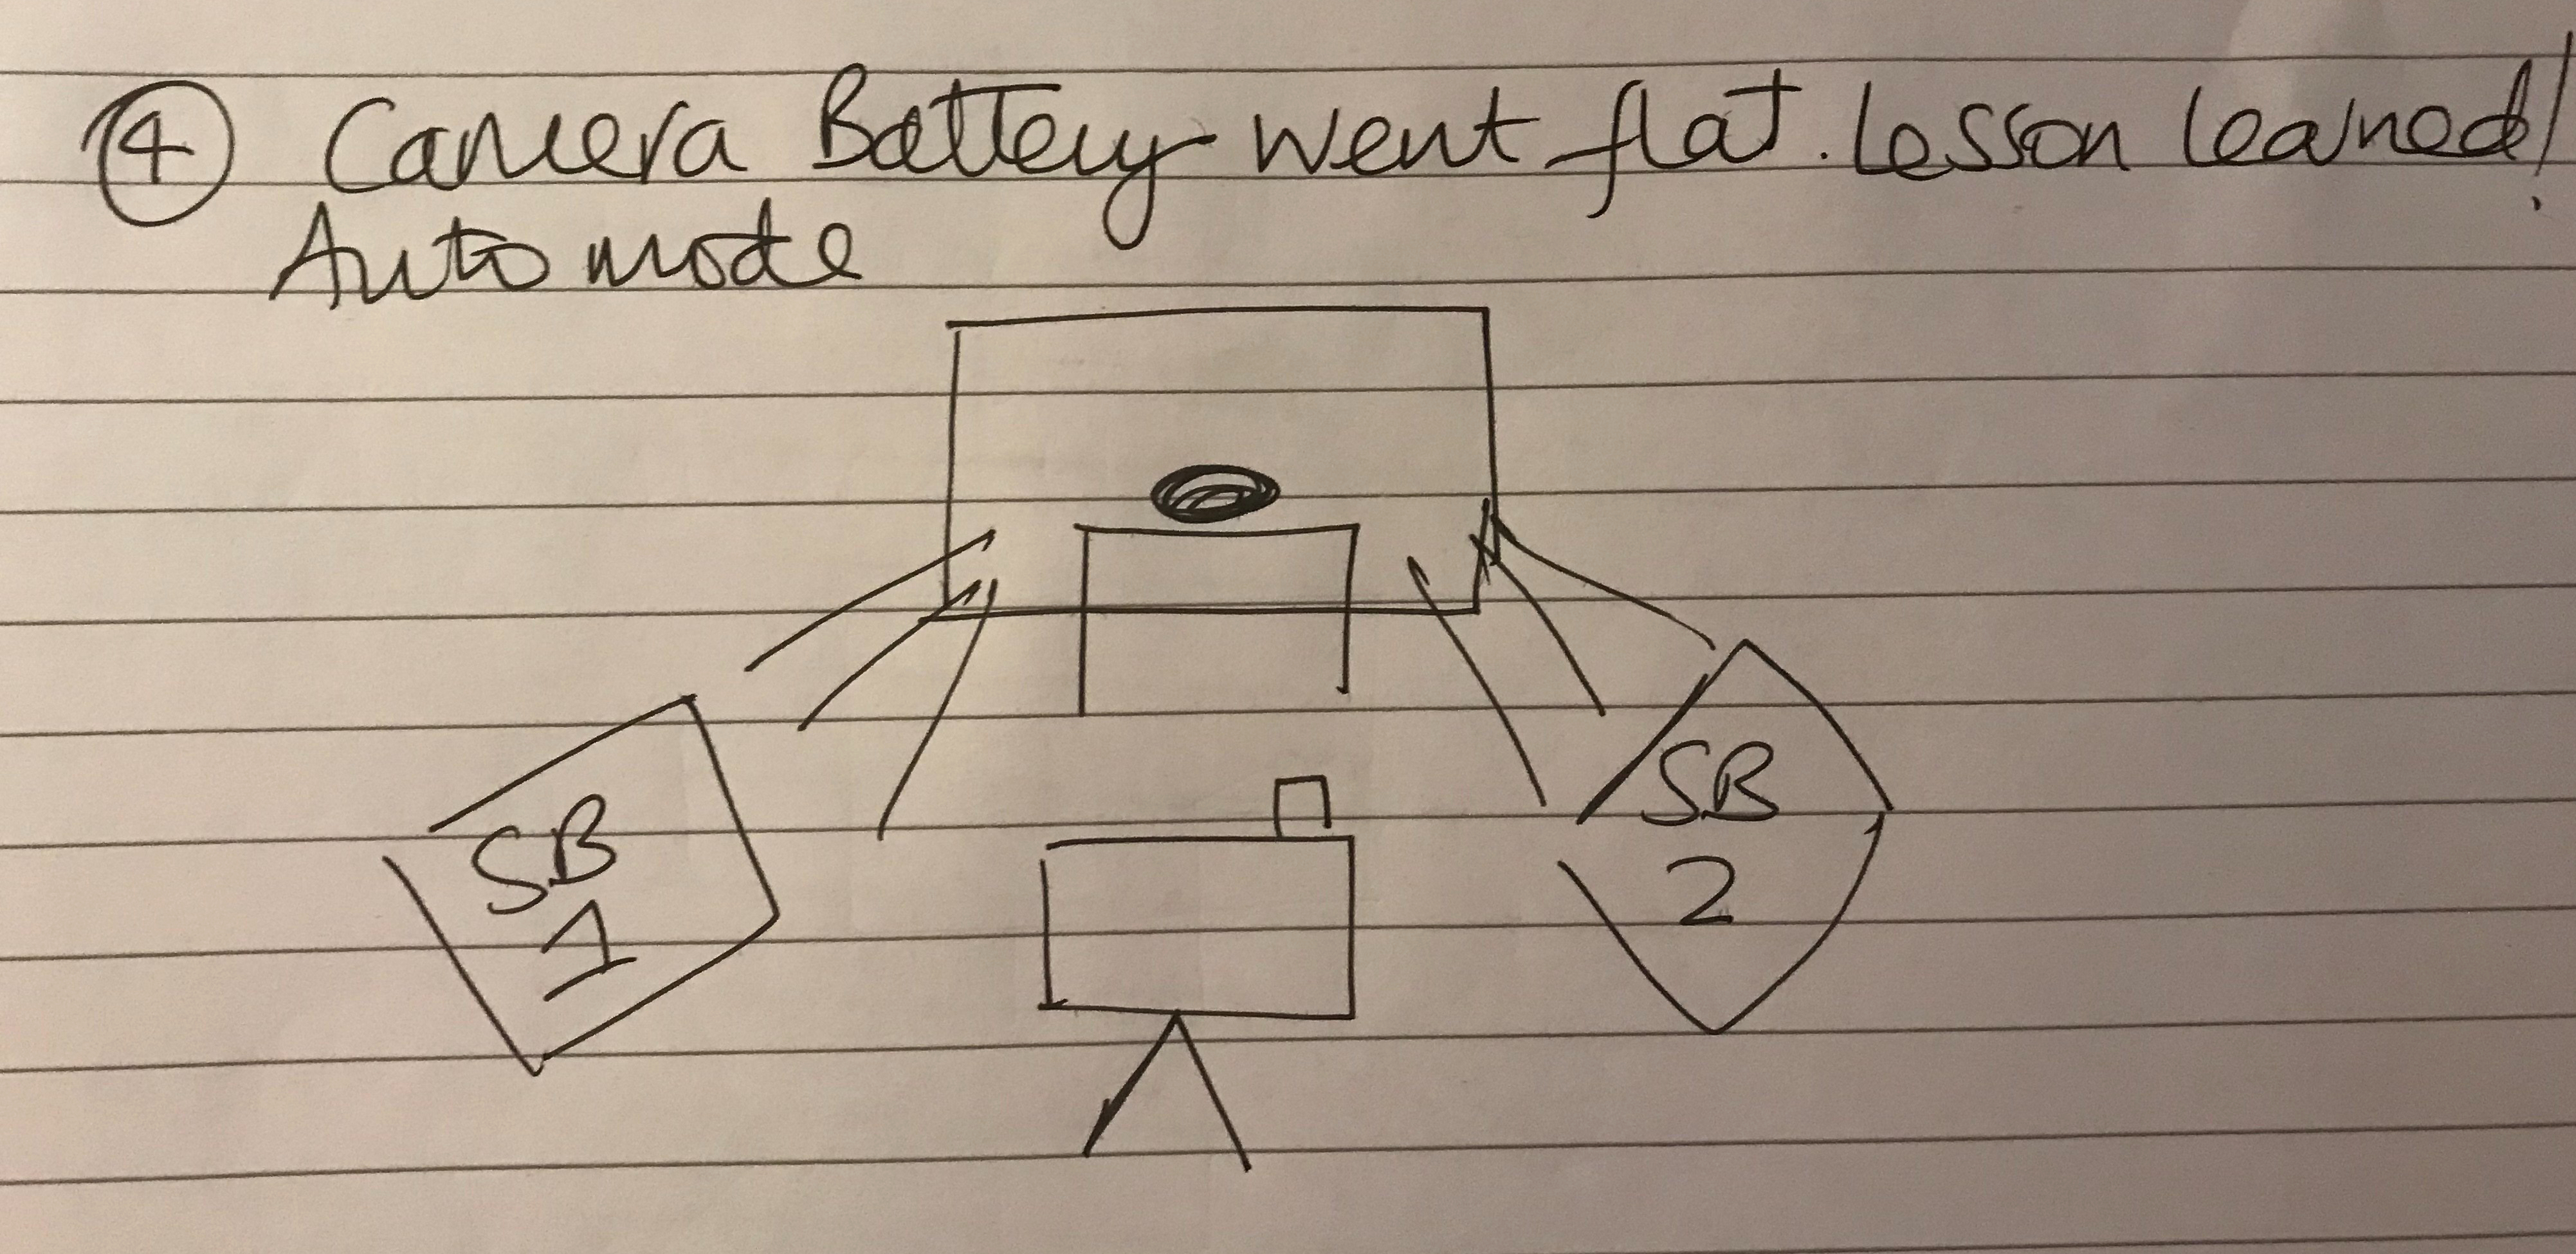
The rock looks perfectly visible but for me lacked any contrast with the shadow and light and looks a little less interesting.
5)
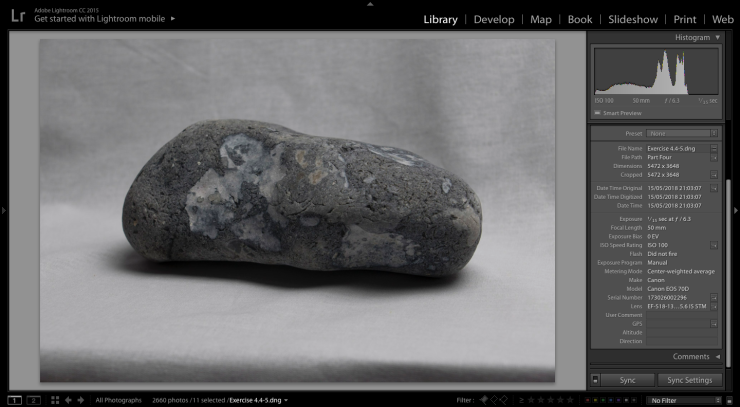
1/15 / F6.3 / ISO 100
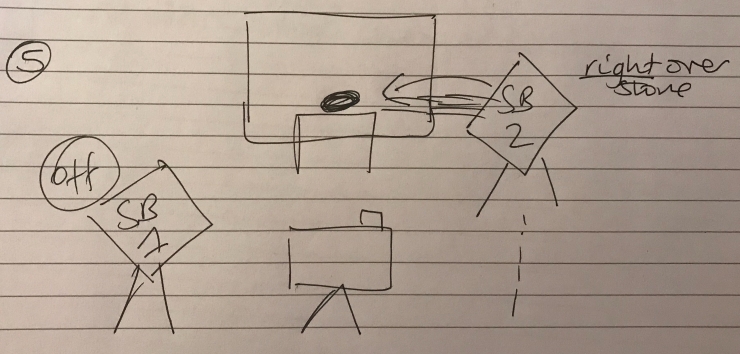
With the second soft box positioned right over the rock the detailing and shadowing revealed its form in a different way.
6)
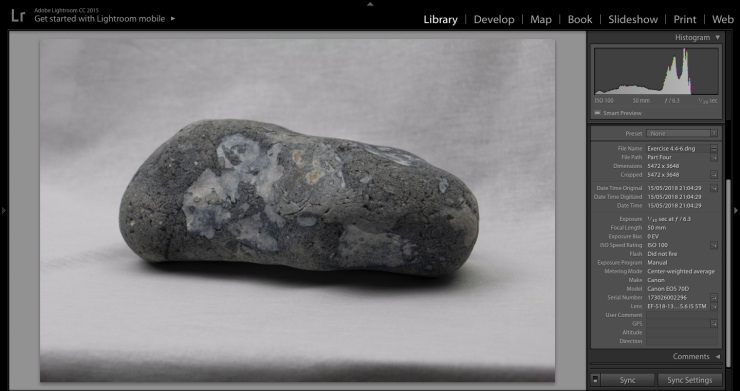
1/30 / F6.3 / ISO 100
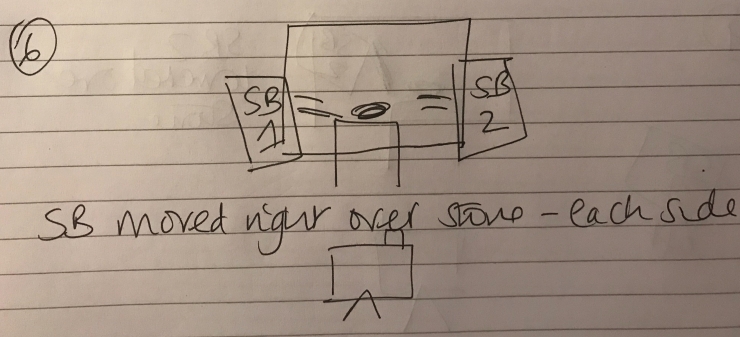
Shadow created under the belly of the rock and no longer stretched out to the sides.
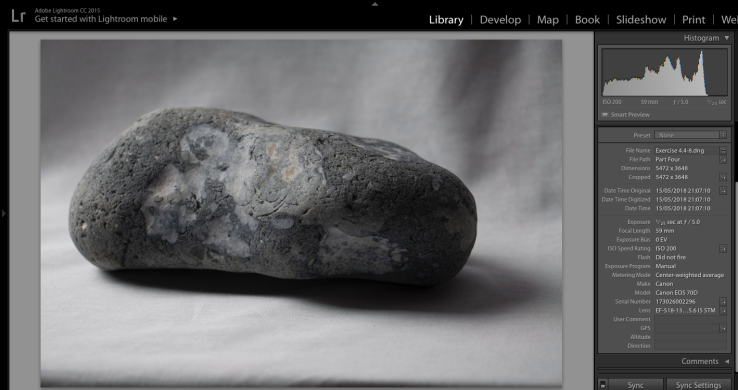
7)

1/30 / F5 / ISO 200
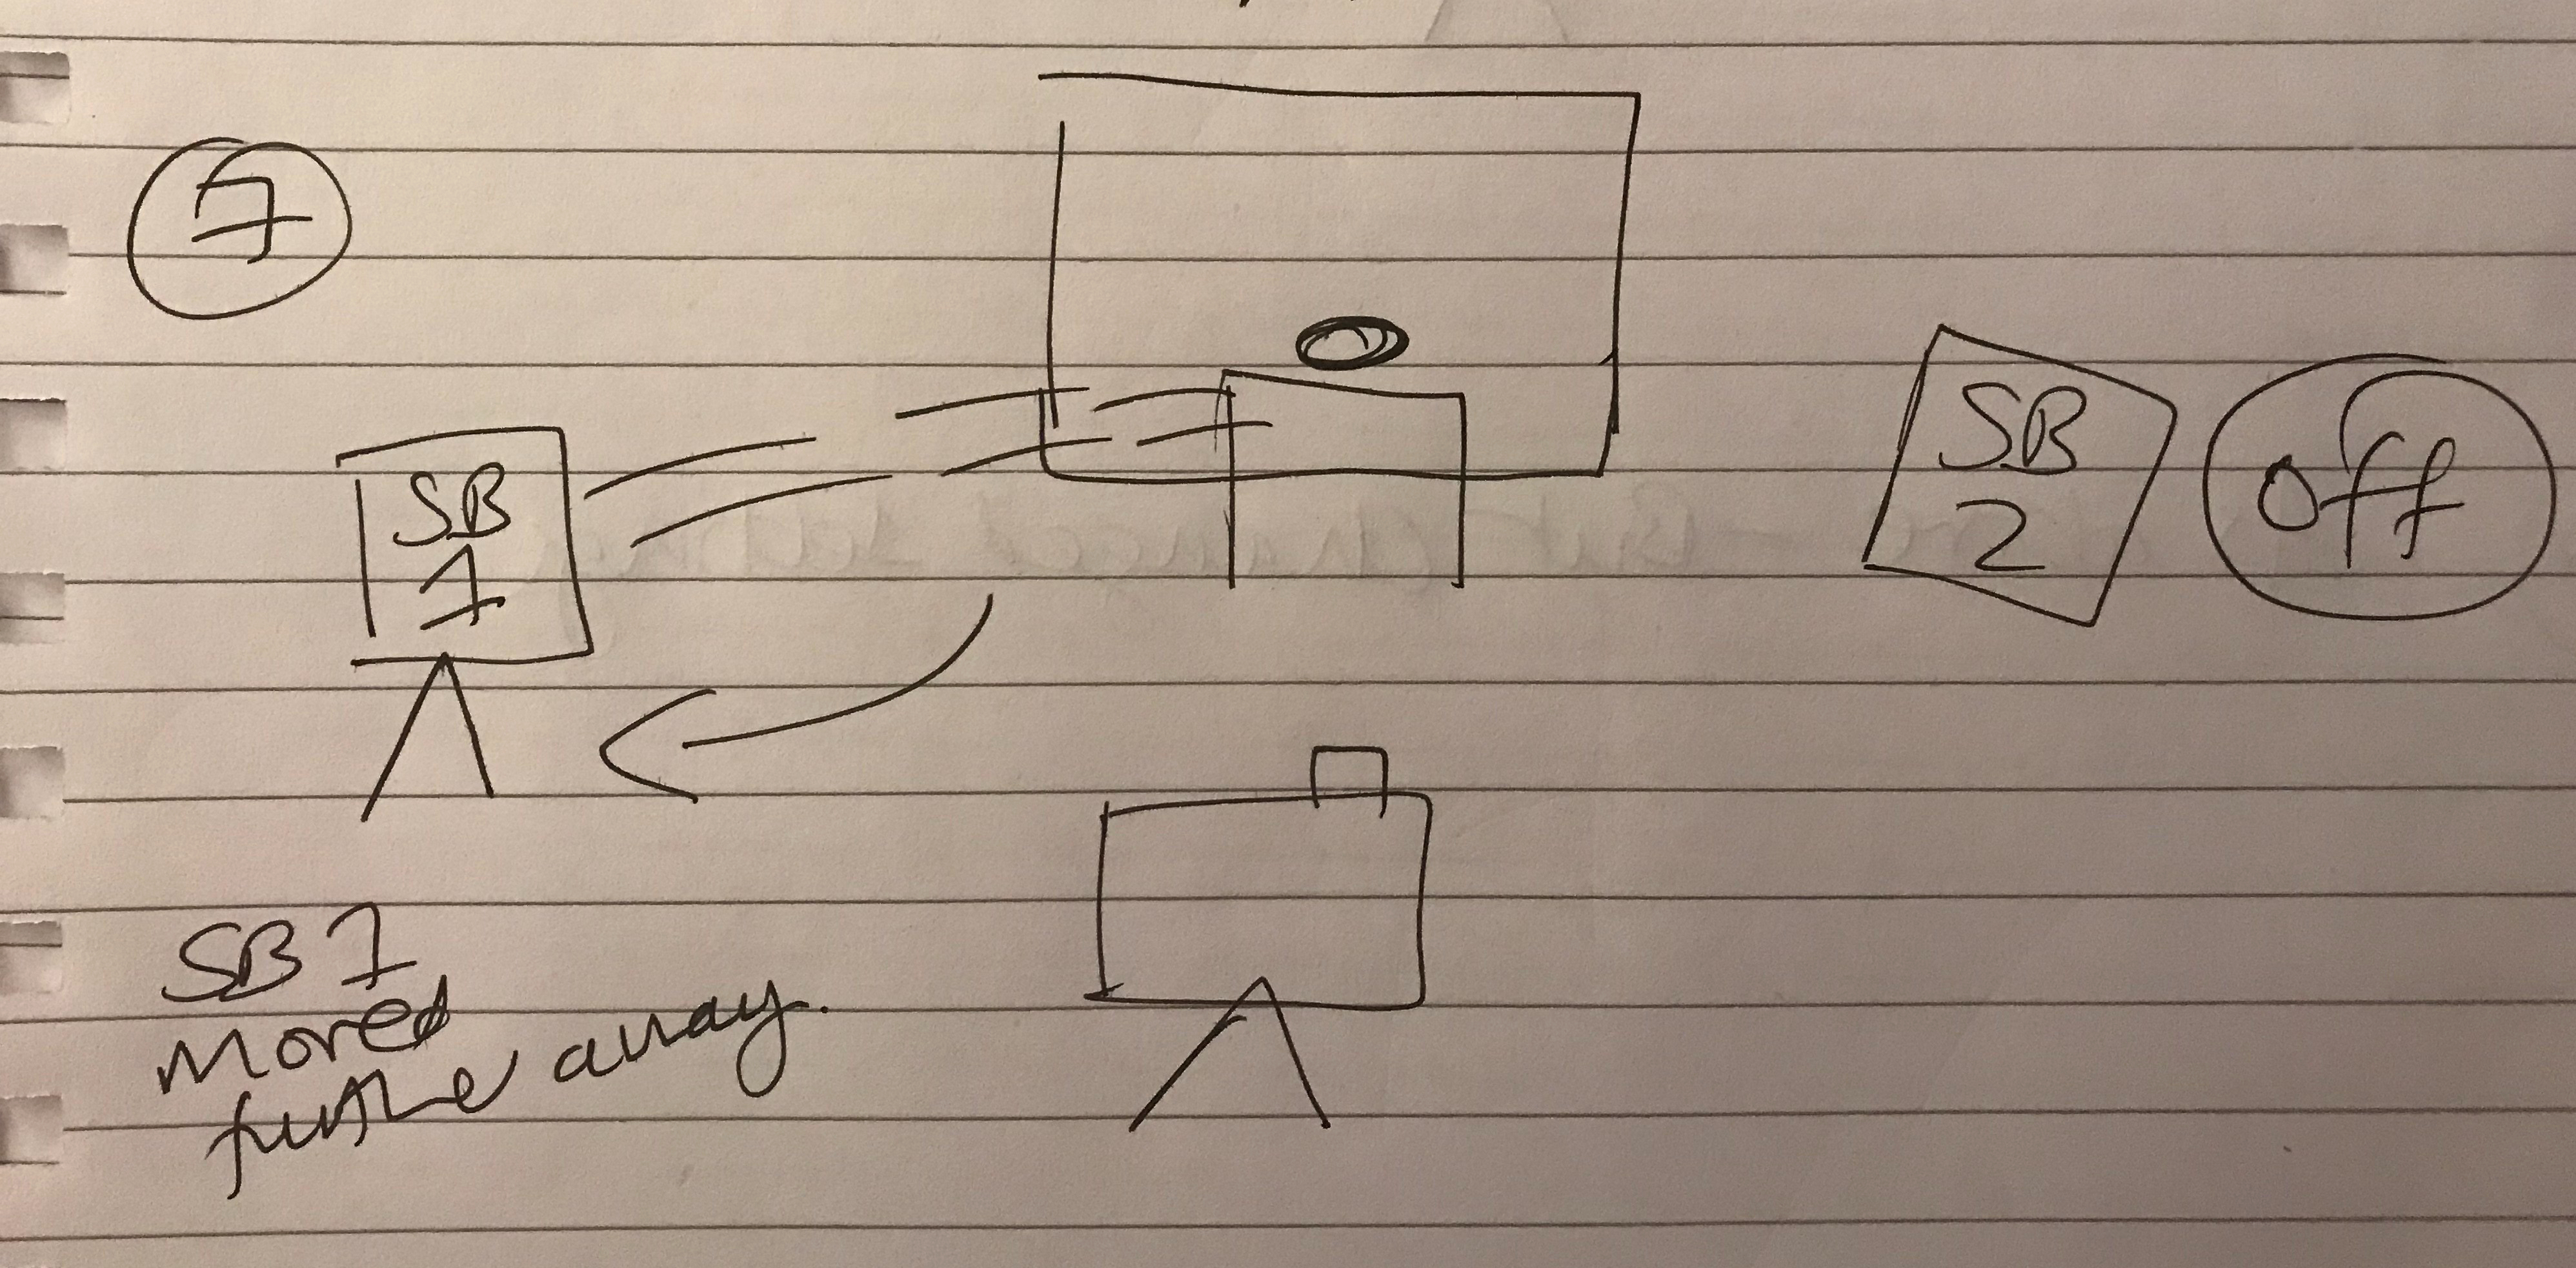
Feel this set up gives more texture to the rock, with the first soft box moved a little further back which diffuses the intensity of the light and the dark shadows on the right side changing the colour and texture of the rock.
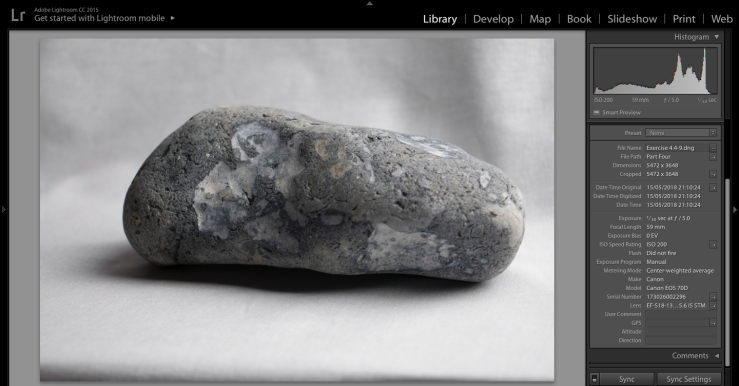
8)
1/25 / F5 / ISO 200
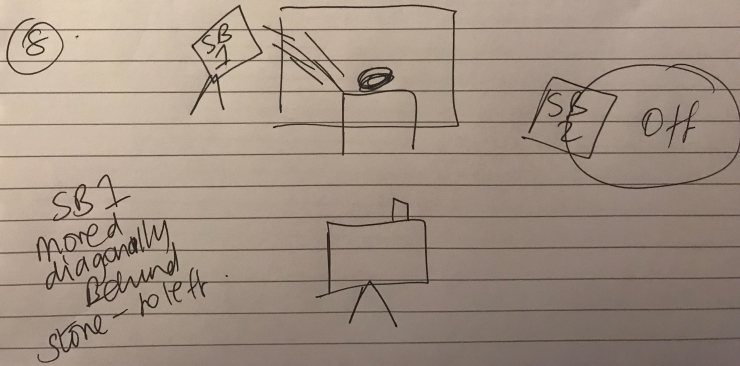 Greater shadows formed underneath the right side of the rock. The shadow is harsh and distinct and takes up more space making the rock look heavier.
9)
1/30 / F5 / ISO 200
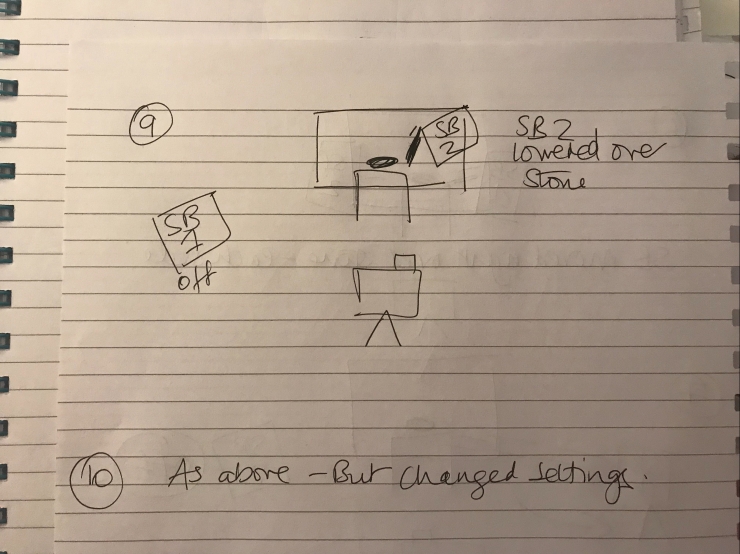
Shadow flipped back to the left side with its right side illuminated under the light. It almost looks like a different rock to some of the other images with the colours and textures that are revealed.
10)
1/13 / F5 / ISO 100
Diagram as above in 9) but with different camera settings.
Things I discovered and learned;
- Always ensure your camera battery has enough juice to finish your exercise. As I went to shoot item 4 my camera’s battery died. Very frustrating and totally avoidable.
- Satisfying having total control over the lighting but it can never, for me, replicate natural daylight as it’s too clear and light. The two seem very different now having done this exercise.
- Essential to write down shooting data & position of lights to keep track of images should you wish to replicate or alter.
- Takes twice as long as you think to set up and produce each image. Patience and meticulous planning is everything to ensure you get your shot.


1 thought on “Exercise 4.4”